Rick Torbett
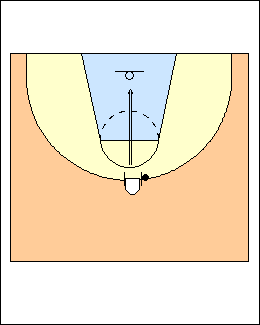 | 1 Rick Torbett To change bad habits, correct your form after each shot, pose (hold your position), examine and make corrections. Build your shot - keep the ball on the shot line - the shot begins in the shot pocket - stance is square to the goal, ten toes straight to it - balance - both feet under your shoulders, back straight, bend knees and hip, don't then bend deeper, your body simply uncoils, if you jump you should land in the same place - grip - the ball rests on fingers and pads of the shooting hand, the guide hand is to the side of the ball with all fingers pointing to the ceiling - ready position - upper arm parallel to the floor, there are two right angles, wrist and elbow - set position - bring the ball down so the forearm is parallel to the floor (the ball should not fall out), there are still two right angles (upper arm perpendicular), the shot pocket is completed (from here you can still pass or dribble) - shot motion - up and out, on the shot line, keep the wrist and elbow in 90-degree positions until you sight the goal between your forearms (i.e., when the ball is above eye level), then extend your arm but not your shooting wrist, your elbow should lock out at the same time your wrist begins to break - point of release - both arms are fully extended, the shooting wrist is fully broken and even flops a little, the shooting fingers (index and middle) are directly above the goal on the shot line, the finger tips should finish above the white square for proper arc, the guide hand finishes with fingers and thumb pointing to the ceiling in the same position relative to the shooting hand as in the set position, the palm should be facing the shooting hand, and the guide hand should frame the edge of the rim - time breaking of the shooting wrist with feet leaving the floor - check your feet after the shot, are they still under your shoulders with toes facing the goal. Summary - ready, set, fire, pose. Mike MacKay - in the ready position the top of the ball is level with the shoulder (triple threat). The guide hand can return to the side of the body after the shot is released, preventing the shoulders from rotating forward. |
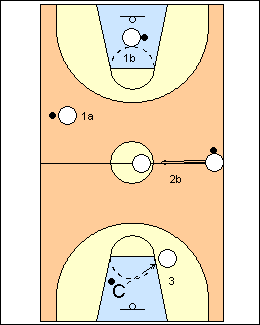
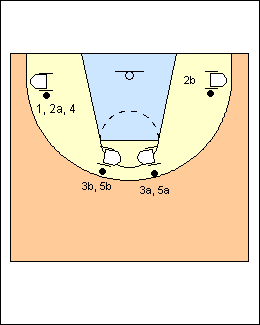 | 2 Footwork 1) Step-up square a) From the set position, step back with right foot, step up with the right foot (stay low), shoot. b) Repeat stepping back and up with the left foot, under the left shoulder. If you catch in an open stance during a game, you will have to step up to shoot. See Shooting - Steve Alford. 2) 1-2 dribble a) Step back with the right foot, take one dribble straight down with the right hand (ball and foot should hit the floor at the same time), step up, shoot. b) Repeat stepping back with the left foot and dribbling with the left hand, the ball is nowhere near the shot line so the off (left) hand turns to the side to pick up and move the ball over to the shot line, allowing the shooting hand to stay on the shot line. A 1-2 dribble is the quickest way to shoot off the dribble (Rick Barry - reach down on the final dribble to pick it up sooner). See Shooting - Frankston step-up (can use a hop step), Eastman quick release. 3) Pivot square-up a) Point your left shoulder at the goal (shoulders are on the shot line), step with the left foot and dribble with the right hand at the same time, pivot on the left heel to square up, dipping the inside (left) shoulder can help in making the pivot and landing square b) Repeat the other way, step with the right foot, dribble with the left hand (a right-hander will have a tendency to under step and not get completely square) (Variation - use a hop step) 4) Two-foot hop (Variation - use a 1-2 step-in) A hop is used in catching a skip pass on the weakside, a pass from the post, a pass on dribble penetration, and is necessary when running or dribbling at full speed. 5) Square in the air a) Point your left shoulder to the goal, spin a pass, take one step with the left foot, get square in the air, catch, jump stop and shoot. b) Repeat going the other way, step with the right foot. (Variation - 1-2 step) See Shooting - GVRTC form. A 1-2 is quickest, a hop can be used to separate yourself from your defender (create space), e.g., as a side hop, to cover more ground going to the goal, or to drive a defender inside the arc then hop back to create space for a 3. J.J. Redick is a big fan of both the 1-2 and the hop. There are right and wrong times to use them, there are times it doesn't matter: - he loves the hop when running down a sideline to catch a pass and shoot a 3 in transition, he can be a little off-balance with a 1-2 - the hop is a quicker way to get your shot off if a defender is really coming at you (closing out) - a step-back with a hop creates space, but making a hop and just going straight up into a jump shot allows your defender to come from the side or from behind, there's not enough space created - a jump stop in the lane gives you options, he may make a floater, a kick-out pass, or give a shot fake to draw a foul. His footwork coming off a wide pin-down screen depends on the timing of the pass and space from his defender. If there's space (the defender gets hung up on the screen) and the pass is late, there's time for a 1-2; if the pass is early (as he is coming off the screen), he is going to use a hop. If the defender does not get hung up, he's probably not going to shoot off the screen and a 1-2 allows opportunities to drive middle or crossover. Generally he will use a hop on a flare off a screen (as he pops back), a 1-2 gives the defender an opportunity to recover. Shooting is a progression. Kids 10 and under can't shoot without using their left hand, they don't have enough strength, so the first thing he would teach is follow through, with that comes good form. Do one-hand shooting 2 feet from the basket, using the backboard, move back to 5 feet. By 12-13 kids should start work on getting the left hand out of their shot. He starts a workout with 50 makes (jump shots) within 5-7 feet of the basket, using a rebounder and two balls, then works his way out. If he misses long or short, he's dead on. Getting a shot off against good defence, the key word is space. Attacking 1 on 1 he will pivot to create space with his feet, he may jab to the right then step back and shoot if the defender steps back, he may jab the other way (step across). Every time he brings the ball back it's in the shot pocket. Attacking off the dribble, if the defender is waiting, fake a crossover to get him off balance, it's a shake, the same as a jab. If the defender is up on you, the most important thing is to use your body, put a shoulder into him, step back and shoot, if the defender comes with you, crossover. coachesclipboard.ca - in a catch and shoot situation, a 1-2 stop is slower than a two-foot stop, which can also get separation. Shooting off the dribble, a two-foot stop is slower and usually means getting closer to the defender, but the challenge with a 1-2 stop is having control and strength for the shot. See Shooting - JJ Redick. |
 | 3 Training Repetition creates habits or muscle memory. 1) Shot stroke Isolate shooting motion from the ready position. From the set position, move the ball above your eyes and let go with the guide hand (waiter position). a) Away from the basket, shoot in the air from a standing position (let it bounce) or a sitting or lying position (catch it with the shooting hand), you can get 40-50 reps in 2-3 minutes. b) An arm's-length away from a basket, from a waiter position stroke the ball over the front of the rim, go for a swish, how many can you get in a row (you can do the same thing sitting in a chair). 2) Shot line For a right-hander with a dominant right eye, the shot line will be a few inches to the right of dead centre; with a dominant left eye, the shot line is dead centre between your legs. a) Practice using a vertical line on a wall, or the edge of the backboard, from the waiter position or with a guide hand. b) Line shooting - move away from the basket, get on a line on the floor. Leave the ground, it's a jumper (from the set position) not a free throw. With a partner, let the ball bounce at least once, you can correct each other, and you can use it to train footwork too (e.g., step-up square), optionally off a pass from partner. 3) Shot vision Use a rebounder/passer. At a comfortable distance from the basket, line yourself up so that one of the net hooks is dead centre on the front of the rim, don't take your eyes off it even when getting a pass (use your peripheral vision), repeat then work your way around the rim. Shoot just over the rim on the same line as the target hook, try for a bull's-eye. See Shooting - Frankston 3-man focus. For serious shot training, use a rebounder, focus on one thing at a time, and target al least 30 minutes with 100 shots. |